The honey hunt & pumpkin pie

  
As I read our faded, battered copy of The Big Honey Hunt, to the kids at lunch today, I suddenly saw the story in a new way.

For those of you who don’t have it memorized, the bear family finish their pot of honey at breakfast one morning, and Mama tasks Poppa and Small Bear with getting more at the honey store. But Poppa decides not to go to the store. He decides they will go on a honey hunt and get some directly from the bees. After a series of mishaps and wrong trees – Poppa clearly does not have any honey getting knowledge or skills – they find honey only to be chased off by the bees. After they escape the bees Poppa takes them to the honey store to get honey and they happily take the honey home to Mama. 

Until today, I always thought of this as a “you should have listened to Mama” kind of tale. But today it got me thinking about food sourcing. Food sourcing is something I think about a lot. I try to buy fresh, local, appropriately raised/grown food all the time, and although the the Seacoast has a fantastic local food scene, it is still difficult. 

In fact sometimes I feel like Poppa Bear, setting off to get some food item but not sure how or where to get it. Often there are mishaps – we run out of flour for a week whilst awaiting our next shipment – and “wrong trees” – there are no white fish at this store, or no organic chickens, or no one has organic fresh horseradish root. But instead of happily giving in and heading to the “honey store,” as it seems the book suggests Poppa and Small Bear should have in the first place, I do more research, or wait, or do without, or plan to grow some next year. Whilst I love the rhyme and pictures in this book, the “just get it at the store” message makes me wince. I hate the idea that ease and convince should, or even could, trump taste and quality. For my part I’ll take the mishaps and wrong trees that go with the honey hunt as long as the taste is worth it. 

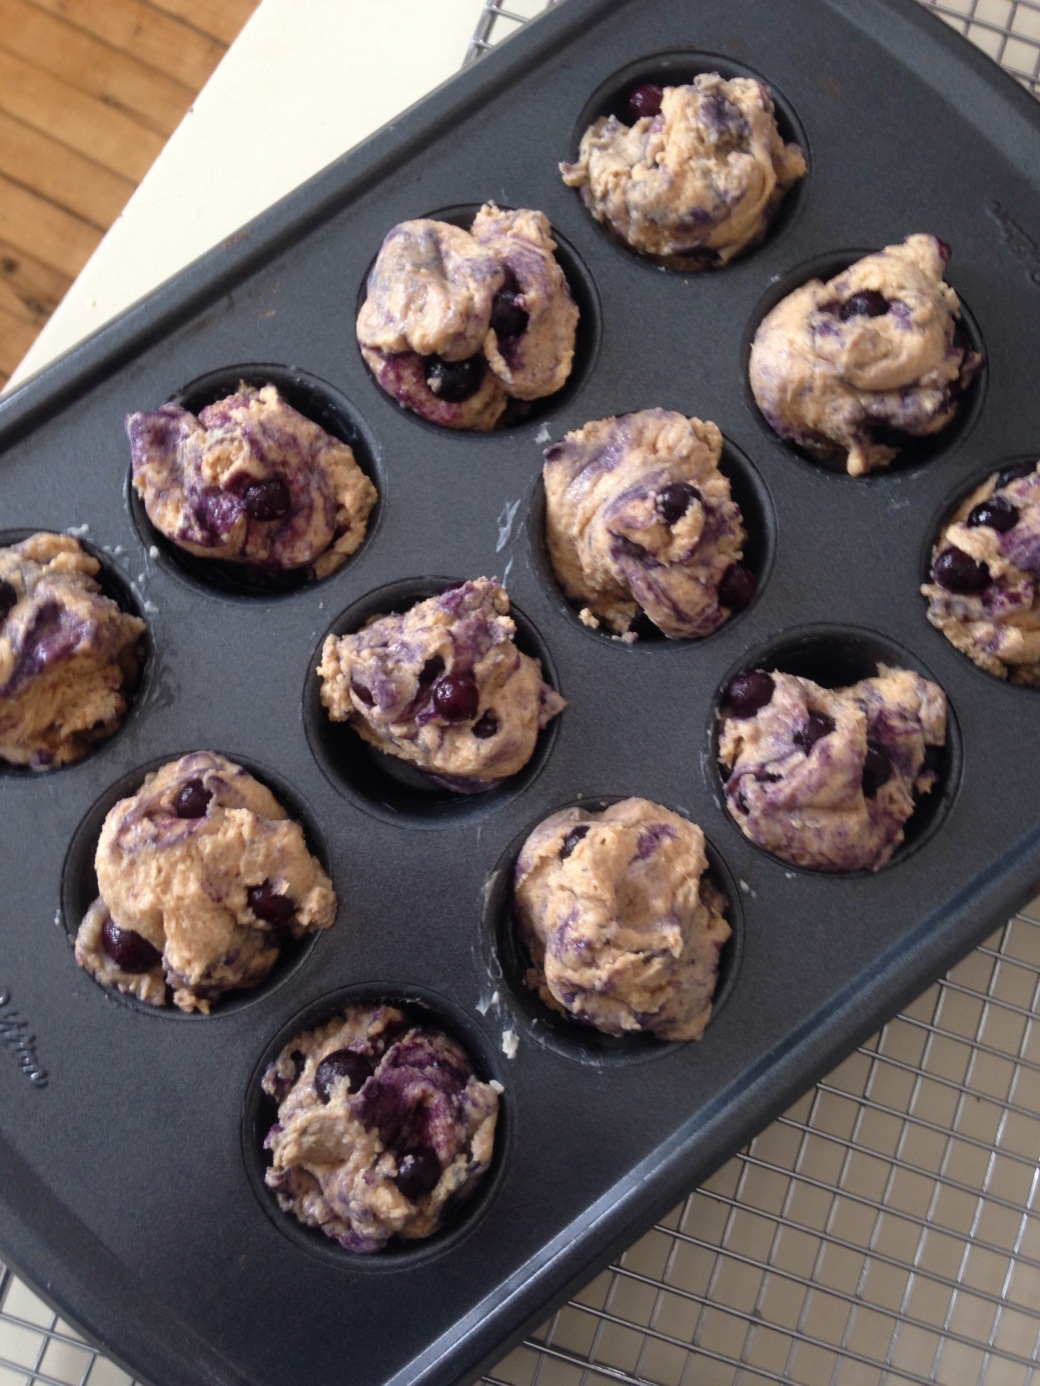
For those times when your flour runs out, or you don’t want to eat carbs or gluten this crust-less pumpkin pie comes in handy. You can use any pumpkin pie recipe and just bake it without the crust. Just watch it and check it early as it’s likely to be ready sooner. 


Crust-less Pumpkin Pie

Adapted from The Moosewood Cookbook by Molly Katzen

  • 2cup (454g) roasted pumpkin
  • 1/4cup (85g) maple syrup 
  • 1/4 tsp allspice
  • 2 tsp cinnamon
  • 1&1/2 tsp ground ginger
  • Grated fresh nutmeg to taste
  • 1/2 tsp salt
  • 2 eggs 
  • 1/4cup water (or 1/2cup milk)


Rule

Cut open the pumpkin and remove seeds. Roast face down on a baking sheet for about an hour at 400F. Cool then scoop out and purée in a blender or use a hand blender.

In a large bowl mix all the ingredients. 

Pour into a greased pie pan and bake at 375F for 10 min then reduce the temperature to 350F and bake 35min more until it is set in the middle (it doesn’t wobble when shaken from side to side). Eat warm or chilled. Store in refrigerator. 

Wild Yeast English Muffins and The Third Plate

   The sun is very hot on the way home from the afternoon school drop. But in the shady “cut-through” the grass is still wet from the dew and my toes get a cool wash in my sandals. I remember how bare and brown this path was in May. How it seemed like nothing would ever grow there. And now it’s so green that the plants nearly block off the path. The sheer vigorousness of life here still astounds me. Each winter it seems annihilated and then each spring it comes flooding back. 

Despite the heat, in the kitchen I’ve moved on to braised meat and lentil soup. The cooler nights make me so cold in the mornings that warming food seems necessary even if it’s too warming by dinner time. Soon enough braises will be just right. 

I’m also in a frenzy to “put up” food. Unwanted apples and wild plums are on my list for the weekend. I have two jars of oven dried cherry tomatoes that I guard like gold and I’m trying to figure out how many squashes I’d need to buy to make it to March. But then a friend reminded me that I could let the farmers keep the squash fresh for me and just buy it at this winter market. Of course. Why didn’t I think of that? 

The real answer is because I’m busy thinking of how to stop going to the grocery store for food. But let me explain. It all started with a book (as most things in my life do). 

I read Dan Barber’s The Third Plate slowly over the last several months.  This book has been wonderful because in it Barber points out that local food as we currently practice it is unsustainable. It does not support the whole farm/farmer and therefore won’t outlast it’s trendiness. However, he explains how it is possible to build sustainable argiculture and how creating a cuisine that uses all of the products of that system is what is necessary to make local food sustainable. I found this idea totally compelling and have been busy trying to figure out many things – like how to get the grains for rotation risotto – ever since. 

Barber focuses on chefs but to my mind it’s really home cooks who would make this change happen. So what I’m thinking is how to get the word to them?

It’s a big question, and one that I imagine I’ll work on for a while, but for now here are English Muffins. They are made with wonderful Maine Red Fife Whole Wheat flour and polenta (just regular grocery store stuff). Maybe one day they will be Rotation English Muffins with locally grown wheat, rye, polenta, and whatever else the farmer needs to grow to make great soil.

English Muffins:

Adapted from Dan Lepard’s recipe in The Handmade Loaf.

  • 500g red fife whole wheat flour
  • 50g whole wheat starter
  • 235g water
  • 200g boiling water
  • 50g polenta
  • 10g salt
  • 35g unsalted butter, melted

Bring water to a boil. Measure out 200g then add the polenta. Pour slowly and stir whilst you pour to avoid lumps. Let this mixture rest while you prepare the other ingredients. 

In a large bowl mix the flour and salt. 

In another large bowl mix the starter & 235g of water. Then whisk in the polenta mixture. Mix until all lumps are gone. Pour this mixture into the flour mixture and stir. Once combined knead the dough together with your hands and shade into a ball. 

Pour the melted butter over the dough. And knead it in. Reshape the dough into a ball once the butter is combined. 

Let the dough rest for 10 minutes. Knead it gently. Let rest 10 minutes. Knead it gently. Let rest 10 minutes. Then left it rise for 6-12 hours. (Mine usually goes all day but I would like to try it at 6 hours to see if there is a less sourdough taste with a shorter fermentation time.) 

Knead the dough and roll out on a floured surface to 1/2 inch thick. Cut into rounds – mine are 3&1/2 inches diameter. Place rounds on a well floured dish cloth and proof for 30 minutes. 

Then heat a frying pan (one you have a lid for) on medium. Do not add any oil or butter to the pan. Turn down the heat to low. Put in two or three muffins and cover. Cook 5 minutes and flip. Cover and cook 5 minutes. Take the muffins out and put on a cooling rack. Repeat the process until all muffins are cooked. You want them to be browned but not too black. 

I usually slice and then freeze them. They come straight out of the freezer and into the toaster oven. Yum. 

This is my first time doing a Sourdough Surprises recipe challenge! 

Pizza Night

 
“That’s a great find,” I say to Imogen when she hands me a small piece of broken pottery. “It was probably the handle of a tea cup. You can see here how it connected to the cup and, look, there’s gold leaf on it still.” She takes in every word then reaches for the piece to hold with the others we have collected from the water just below Hamilton House. 

There’s a great spot for swimming there, but it’s even better for treasure hunting. We have found pieces of pottery, brick, metal, even an old pipe stem. Imogen loves peering into the water in search of white spots, and then I stick my hand down to lift out the treasure. 

The sun is still hot and the water feels warm but the days are getting shorter and I cannot escape the feeling of impending winter. In July I felt like I was stuck in some kind of parenting nightmare – two kids all day everyday – but August has gone by too fast and I’m not ready for summer to be over. I know the hot weather will continue. There will still be swimming and picnics and the beach, but the nights are colder and I know that soon I will have to stop reaching for my shorts in the morning. 

After swimming we came home to pizza night. Well, it’s pizza night for Imogen. The rest of us have steak and frittata. But Imogen loves pizza night and one pizza gives her dinner and then lunches for nearly the whole week. 

Pizza

  • 50g wild yeast starter
  • 275g whole wheat flour (I’m now using Sprouted Red Fife from Maine Grains and I love it!)
  • 180g water

Mix together and let rise for at least 6 hours. 

Add:

  • 1/2 tsp salt
  • 1&1/2 Tbs olive oil 

Preheat the oven to 425F.

Knead to combine. Let sit 10-15 minutes.  


Oil a jelly roll pan well. Press dough into the pan. Put oil on top of the dough. Then add tomato sauce – sometimes I just use tomato paste with some herbs. Top with mozerella, and other toppings if desired. Bake at 425F for 9-10 minutes. Transfer to a cooling wrack and let sit for 5 minutes before slicing.  

Fermentation Station: Onions

 
It’s hot. Even in the middle of the night, it’s hot. It was never that hot in Britain. I almost never even wore shorts there, whilst here I’m in shorts for two months straight. 
It’s so hot that it’s even hard to remember what the snow and cold felt like. I glance at the wood stove and wonder how we ever needed its heat. This is the world I remember. The way things were where I grew up: hot summers, cold winters. Each so strong that you can’t quite call to mind the feel of the other. I feel more comfortable with these strong seasons than I ever did in the UK. There the months gently roll from cold and rainy to warmer then back to cool. I never dried out. I never got hot, so I always felt cold. 

I was glad to find that when we went back to the UK for a visit in June my winter here in Maine had made me hardier. Others would be saying that the day had chilled down and I wouldn’t have noticed. It’s the extremes that have made me hardy. All of those years of temperate seasons just made me cold and damp. 

I like it hot. It’s good for going to the beach. 

And it’s good for fermenting foods. We are going a bit “fermental” here, to coin a word. We are fermenting like crazy. Each week in our CSA there are usually several vegetables suitable for fermentation – cucumbers, cabbages, carrots, zucchini. 

We’ve been having fermented foods at every meal and the kids have really been enjoying them. They must be making an impact on Imogen because she came up with this fantastic idea to write a fermentation recipe where she draws the pictures and I do the words. A brilliant idea that I couldn’t pass up. 

This week’s recipe is for fermented red onions – illustrated by Imogen. They are sweet and tasty and leave no oniony after-taste. Enjoy! 


Fermentation Station: Turnips


Five-year-old’s hand in my left, one-year-old’s in my right we made our way through the sand eyes fixed on the waves. The water came to meet us and we drew a breath – it still feels like the Atlanic has just melted. But the air is warm and the sun is hot so we all three keep going. Rhys grinning until he stumbles and gets a face full of saltwater. I carry him and we wander up and down the beach keeping our feet in the water as long as we can manage before scrambling out then going back for more. 

I could only agree with my daughter who, between howels of delight, kept saying, “I’m so happy. I love this.” Me too. And this is only the beginning of summer.  

Besides being the first proper beach day of the season, it is also the first day I have managed to eat fermented foods at all three meals. This goal has been with me since reading The Art of Fermentation a few months ago but breakfast was catching me out (even though my bread is made with wild yeast I am not counting that as I want live microbes): what fermented food could I eat at breakfast? Well, I had fermented turnips, and they were very tasty. 

Fermented Turnips

  • 2 cups warm water
  • 25g salt
  • Several mini or small turnips washed but not peeled. 

Cut the turnips into small stick sized pieces. Mix the water and salt to dissolve. Put turnips into a jar and pack down. Then add saltwater to cover. Push the turnips down with a spoon. Put a lid on top but do not seal it. Leave on a counter at room temperature for 3 days to 1 week. Every morning and evening push the turnips under the water with a spoon. You’ll see bubbles. This means fermentation is happening! Feel free to taste as the week goes on. Once they seem tasty to you, put the lid on and store in the fridge. 

Complication or Mise en Place? and Shortbread

 
“So soaking flour brings out the chemicals in the grains which keep them from sprouting. And, as those chemicals are hard for humans to digest, soaking the flour makes it easier to digest,” I say to my husband, proudly expounding this latest baking-game-changing fact. His wry smile says “so you’re making our lives more complicated again?!” 

Yes and no. 

Soaking flour does mean planning ahead. I no longer bake anything without soaking it for at least 12 hours, so gone are the days of think, bake, eat. At first it was frustrating. The kids wanted a snack and I had nothing ready. But I soon realised that all I needed to do was plan it in, and instead of feeling like this is a burden I have found it feels much calmer because I am organized. 

It is like a larger scale mise en place – the words chefs use to mean having everything prepared and ready.  Each evening I think about the next day’s snacks – do we have any? If no snacks are ready, then I think what have we had recently? And what can I make? I make something and put it in the fridge. The next day I am ready. I can pull out the snack, bake it, and voila, we are set for the day.    

I’ve been doing this more and more. I make sure we have frozen sourdough pancakes and waffles in the freezer, oatmeal soaking in milk for my daughter’s breakfast in the fridge, some vegetable fermenting on the shelf,  flour soaking for bread, and meet defrosting for dinner. It is a lot to think about but keeping my mise en place going is what keeps our stomachs happy and full and that comfort is worth the preparations. 

Shortbread

  • 5.5oz whole wheat flour
  • Pinch of salt
  • 2-3oz chopped nuts (pecans, cashews almonds, or any other nut or seed you like)
  • 1 stick of unsalted butter (4oz)
  • 1/2 tsp vanilla
  • 2oz honey

Rule

Melt butter. Add honey and vanilla. Set aside. In a large bowl mix flour and salt. Add chopped nuts/seeds and combine. Pour over the butter mixture and stir well. Press into a greased pie pan with the back of a metal spoon or Saran Wrap. 

Refridgerate over night. 

The next day bake at 350F/180C for 15 minutes until brown at the edges. 

Spring

 It’s the birds that make the difference. Their constant calls ambush us as we step out the door. Overhead they soar, black and white check marks against a true blue sky. Looking straight up, my neck bent back until it’s nearly uncomfortable I watch geese gliding by, then a bird of prey float and swoop holding wings wide-wide, then brilliant white and grey seagulls dive and cross each others’ paths. 

Spring has been long in coming. But the sun is strong and long and its arc already extends so far that we get sun in windows that I couldn’t have predicted. Even in the height of summer we will not get as much sun as we get now with the trees in their leafless transparency. 

But the birds are the real proof of the season. On our walks Rhys swivels his head to point to robin after robin and then excitedly to the one house where bunches of purple crocuses have bloomed. The cardinal sits in our apple tree most mornings and the ratta-tat-tat of the spotted woodpeckers echos down the street. 

Today the sound of the wind in the branches made me feel like I was on the beech already, and looking up at the trees I see buds. Spring is springing on us at last. 

I just love being back in Maine where we have the full range of weather. The hot summer and the cold winter really play off of each other. Even in my first Maine summer in college I understood that what makes summer here so wonder-full is the winter. Once you make it through the long cold time you are truly grateful for the hot summer days and the cool sea. In fact I think this long winter has my daughter convinced that it will never be hot again. 

But summer will come in all its glory and the birds are ready. 

  
These blueberry muffins have been on high rotation around here. 

Blueberry Muffins

9 oz. whole wheat flour
2 oz. corn meal
2 tsp baking powder
1/2 tsp salt
8 oz. unsalted butter 
2 eggs
1 C water or milk
2 oz. honey
1 tsp vanilla
1 C blueberries (frozen or fresh)
Mix flours, salt, and baking powder. Add eggs, melted butter, honey, vanilla and water. Whisk well. Refrigerate overnight. 

When ready to bake, preheat the oven to 425F.
The batter will be stiff. That’s fine. Mix in the berries and scoop into greased muffin tins bake 10 minutes at 425 then reduce the heat to 375 and bake 7-9 minutes until browned. Take out of the pan and cool. 

Sugaring Sunday & Pie

 Imogen’s heavily glittered Christmas decorations still spin and dangle from the curtain rail above me. They catch the sunlight while the birds chirp outside. We understand their chirps mean spring is coming even if it got down to 11 degrees Ferinheight last night. The day promises warm sun and we are in the mist of sugaring season; when the maple trees (which are many here in Maine) are tapped for their sap which is boiled down to maple syrup. 

And last Sunday, sunny but bitterly cold with a single digits wind chill, was Maine Maple Sunday. So we drove over to Chase Farm in Wells, bundled up and hurried from the car into their warm farm shop to taste this year’s syrup. 

They harvest the sap and then put it into a huge steel machine with a tank on top and a woodburner below. The wood fire heats the sap and clouds of steam billow up the chimney and off the top of the tank. The sap gradually thickens and the sugars in it burn to a caramel color. 

Tiny paper cups of warm syrup were then passed around on a tray and we sipped, as if tasting a fine wine. The syrup was nutty, sweet but not tooth achingly so, and much loved by my two kids! 

I love the idea of a community ritual to celebrate spring. Long New England winters are beautiful and cozy, but the end of winter is surely a thing to be celebrated. We do eat maple syrup occasionally, but I have found myself eating it less and less because it seems too sweet to be healthy. But, that said, a small sip of warm syrup in the room where it was made surrounded by the trees it came from is well worth doing once a year to celebrate the end of winter and the beginning of spring. 

Pie is something that is well worth eating more than once a year. Ever since I found the best and easiest pie crust recipe I have been a big fan of pie. And here in Maine our favorite type is apple and blueberry.   

We all adore pie but I don’t make it that often. So we have started a new birthday tradition: instead of cake we have pie. This was my birthday pie at the end of last month.         

Apple Blue Berry Pie

For the crust
250g whole wheat pastry flour
225g salted butter (two sticks comes to just under this amount and works fine)
110g water

For the filling
4-5 Macintosh apples
1 cup blueberries fresh or frozen 
2 Tbs whole wheat pastry flour
1 tsp cinnamon
80g honey 

The instructions for the crust are found here. I’ve added more water because the whole wheat flour needs it. 

For the filling peal and slice the apples. Put them in a large bowl and add the blueberries. Then add the flour and cinnamon. Stir to coat the fruit. Add the honey and stir to coat. Let this mixture sit while you roll out the crust. Seal the edges, prick the top, and bake at 350F for about an hour. Until the pie bubbles and the apples are soft. 


Alaskan Pancakes


A couple of weekends ago I had left the pancake batter to ferment for 24 hours. I knew it was likely to make more sour tasting pancakes, as after 12 hours or so the bacteria out pace the yeast and create more sourness, but when I tasted the first pancake off the griddle it was way too sour. My one year old agreed – he’d taken a bite and then dropped the rest on the floor. 

Looking at the rest of the batter I suddenly remembered something I’d read in one of Sandor Katz’s books. In Alaska during the gold rush sourdough was a vital food-stuff. It didn’t freeze (as long as you kept it on your person over night) and it kept people healthy. I had never heard about this and was fascinated but the practical fact was this: in order to take the sour taste out of their pancakes Alaskans added baking soda. And so with a bowl-full of sour batter I added 1/2 a teaspoon of baking soda. The batter instantly foamed and the pancakes puffed on the griddle like I’d used buttermilk (of course buttermilk pancakes call for baking soda too!). They were light and fluffy and not one bit sour. Success. 

So here is the Alaskan version of the pancakes. I’ve also suggested adding all the water for the overnight soak as this makes a very smooth batter with no risk of lumps when you add the extra water in. 

Alaskan Pancakes


24 hours in advance or overnight soak:

  • 50g starter
  • 170g water
  • 150g whole wheat flour

When you are ready to make the pancakes add:

  • 75g melted butter
  • 19g honey
  • 2 eggs
  • Pinch salt

Mix well, then add:

  • 1/2 tsp baking soda

Cook on the griddle as you would any pancake. 

Sunshine and Starting a Starter

IMG_1403
These days the sun is lightening the sky as we get out of bed, not an hour after, and we sit down to dinner and sunset, not dinner in the dark. The birds are singing and swooping. The signs of spring are in the air, even though the ground is covered with a heavy blanket of snow that will last for months yet. But I don’t mind. I love the sunlight on snow, the white and blue world with pin pricks of red cardinal and green pine. Somehow I don’t need the green grass and sprouting bulbs to feel spring. The sun does it all. Knowing that this sun will only get stronger until the snow melts and the heat seeps into every living cell, and we all bask in the warmth for the summer is enough for me.

I have always known that I love winter, but I have only just realized how much I love summer too. This past one, our first back in the States, was so hot. Feeling warm everyday, all the time for days on end, was not something I had felt for 11 years. I missed it. And now I look forward to the hot sun again this summer; to that easy feeling of being outside in shorts, t-shirt and bare feet; to knowing it will be hot again tomorrow and the next day and the next. Winter has made me appreciate summer more than ever, but it will come soon enough. For now, I will ice skate under the blue sky surrounded by white fields and be happy.

IMG_1355

There is a lot of advice about starting a wild yeast starter out there but as I’m likely to be putting up several posts that use it here is my own version of starting a starter.

You can do this with any flour but I recommend using tap water as I’ve killed off a starter with filtered water before. I use rye flour because I love rye, but it is supposed to have a lot of microbes on it which help to start the starter so it might be a good choice to get things going. You can always switch to feeding your starter a different kind of flour later on.

IMG_1374
Day 1
In a glass jar mix 45g rye flour & 50g water. Cover with lid but do not seal tightly.

Day 2
The starter may look bubbly or not. Either way add 45g rye flour and 50g water and mix well.

IMG_1375
Day 3
Same as day 2.

Day 4
If you are getting bubbles remove 150g and then add 45g rye flour and 50g water.

Day 5
Things should be bubbly now. In the morning take out 15 g of starter and put it in a clean glass jar. Then add 25g rye flour and 27g water.

In the evening take out 50g of starter and throw it away. Then add 25g rye flour and 27g water.

Day 6 and thereafter
Cull (or use) & feed the starter twice a day. So if you are going to make pancakes one night put the 50g of starter that you were going to trash into a bowl and follow the recipe instead. Remember to feed the starter too. If you don’t bake with the starter throw the 50g away and feed. The yeasts need fresh food to eat frequently.
IMG_1377

IMG_1378

IMG_1379